Most roof faults can be seen if you get close enough: a slipped tile, a split in the lead, a gutter hanging off its brackets. Moisture trapped inside a flat roof is different. Water can soak into the insulation under a membrane and spread sideways for metres, while the surface looks sound and the ceiling stain appears somewhere else entirely. Finding it by eye means guessing, or cutting open the roof in many places.
Thermal imaging offers a way to look without cutting. An infrared camera records how warm or cool each part of a surface is and turns the result into a picture. Wet insulation holds and releases heat differently from dry insulation, so on the right evening a damp area can stand out. A trained operator then reads the pattern and marks where to look more closely.
It is a specialist tool with real limits, and it is not the right survey for every roof. This guide shows what it is good for, the conditions it needs, what it cannot tell you and what it costs. MyBuilder's roof inspection guide, updated on 21/08/2026, is the source of the typical UK prices quoted below.
How a thermal camera sees a roof
Every surface gives off infrared radiation in proportion to its temperature. A thermal camera cannot see through a roof. It records the temperature of the outside surface, which is shaped by what lies just beneath it. That is the whole principle, and understanding it explains both the strengths and the weaknesses of the method.
On a flat roof the layers are usually a waterproof covering on top, insulation below it, then a deck and a ceiling. Dry insulation resists the flow of heat. Wet insulation is a much better conductor and also stores more heat, because water takes a lot of warmth to raise or lower in temperature. After a sunny day, when the roof has soaked up heat, the surface above wet insulation tends to cool more slowly than the dry parts around it. On the camera screen, that shows up as a patch of different colour.
The operator does not rely on colour alone. They take ordinary photographs from the same positions, so each thermal image can be matched to a real part of the roof. They note the time, the weather and the state of the surface, because any of these can change the picture.
What the picture is, and is not
The image is a map of surface temperature. It is not an X-ray, and it does not show water as such. A patch that looks wet may be wet insulation, but it could also be a change in material, a pipe below, a shaded corner or a puddle on the surface. That is why a thermal survey ends with a human reading the evidence and, usually, a second method to confirm it.
What a thermal survey can find
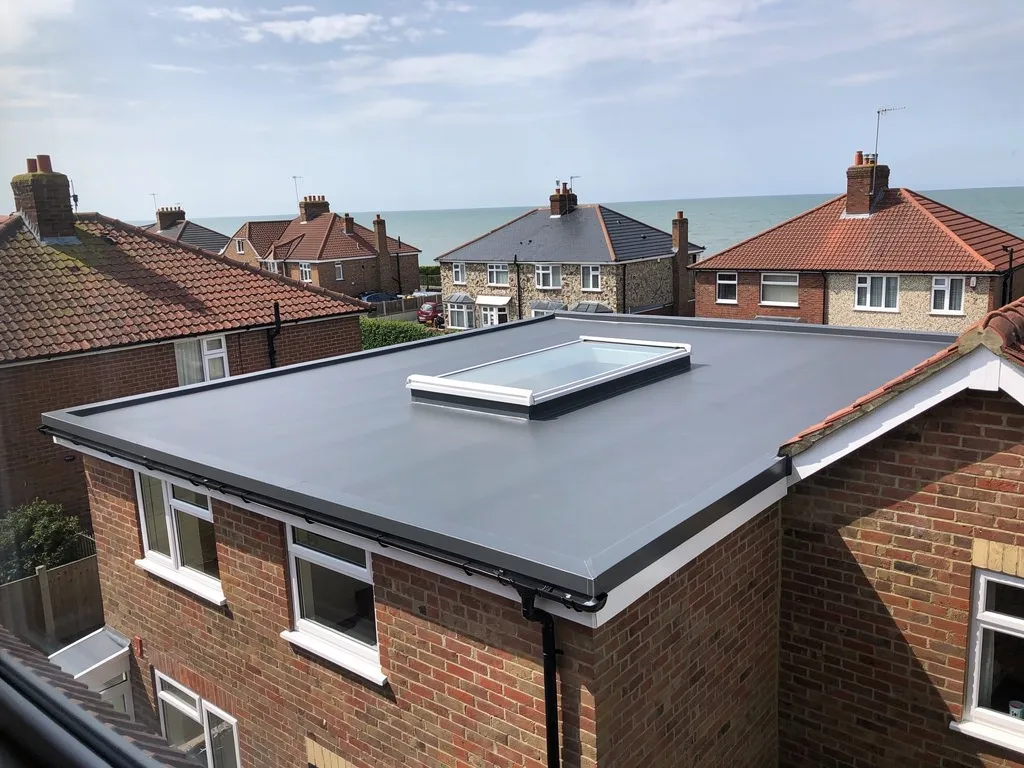
The main use is trapped moisture in flat roofs. Large flat roofs on shops, blocks of flats, schools and extensions are built up in layers, and when the covering fails, water can travel along the insulation or the deck to a point far from where it came in. A thermal survey can outline the damp area, which helps in two ways. It shows how much of the roof is affected, and it narrows the search for the opening so that a repair can go where it counts.
That can change the decision. If wet insulation is confined to a section near a rooflight or an outlet, a local repair may be enough. If it covers most of the roof, patching is unlikely to hold and recovering becomes the sensible conversation. The camera does not make that choice; it gives you the extent of the problem, which is what the choice needs.
It can also reveal heat loss. Gaps in insulation, thermal bridges where a structural member runs through the build-up and air leaks around hatches and pipes can all show as warmer areas on a cold day. On the ceiling side of a room in the roof, the same camera can show where insulation has slipped or is missing.
For pitched roofs, thermal imaging has a narrower job. It may help to trace a hidden leak that has soaked the loft insulation, or to check a loft conversion where the slope is hidden behind plasterboard. In most pitched roofs, though, a loft inspection and a ladder check find the same faults faster and for less, as our guide to what a roofer checks describes.

The conditions a good survey needs
A thermal survey is only as reliable as the conditions it is taken in. A roof surveyed at the wrong time can look uniform when it is not, or patchy when it is sound, and a careful operator will say no to a day that will not give a clear result.
Timing is the first issue. The temperature contrast between wet and dry areas is strongest when the roof is releasing heat it has stored, which is why surveys are often done in the evening after a dry, bright day or at the start of the night. A cloudy, damp or windy day gives weak contrast, because the roof never warms and the wind cools everything evenly.
The surface comes next. Standing water, wet leaves, moss and loose gravel all distort the readings. Reflective surfaces such as bare metal or shiny membranes can bounce back the sky and show a false picture. Shade from a chimney, a parapet or a neighbouring building creates cool areas that are not caused by moisture. The operator allows for these by walking the roof, noting what is there and sometimes repeating the scan from another angle.
Access and safety
Most flat roofs have to be surveyed by someone standing on or beside them, or by a camera on a drone or a pole. The operator needs safe access, a hatch or a ladder, and a roof strong enough to walk on. Fragile materials such as old cement sheet or rooflights are not to be stepped on. If access is the sticking point, our page on inspecting your roof from the ground shows what you can safely check before anyone is booked.
The survey is planned around the weather, which is why dates sometimes move.
What thermal imaging cannot tell you
No one method sees everything, and thermal imaging has gaps that are worth knowing before you book.
It does not pinpoint a hole. The camera shows where the roof is wet, not the exact crack in the covering that let the water in. A damp patch may be some distance from the opening, because water travels. The operator uses the pattern to suggest where to look, but the opening itself is found by close inspection, a moisture meter or a controlled water test.
It does not give you a moisture reading. A patch that is warm on the image has an abnormal temperature, nothing more. Whether the insulation is lightly damp or soaked, and whether it can dry out, is something to check by other means, such as a meter probe, a small test opening or a core sample taken from the roof.
It struggles with some roof types. Heavy tile and slate roofs hold little of the heat that matters, and a loft void between the covering and the insulation breaks the link between the surface and what lies under it. Metal roofs behave very differently from membranes, and the readings need careful interpretation. A thick layer of gravel or green roof planting hides the surface altogether.
And it records a moment. A roof scanned in a dry week can hold moisture that no ceiling shows yet, while a leak that opens only in a gale may leave no trace on the day. A clean scan describes one evening and cannot forecast what the roof will do next winter.
For all these reasons, use thermal imaging to decide where to look first, and let a second check confirm what it suggests.
What a thermal survey costs and when it is worth paying for
MyBuilder's guide gives typical UK figures of £300 to £500 for a thermal survey. For comparison, it lists £150 to £250 for a standard inspection and £200 to £400 for a drone survey. The thermal price is higher because of the equipment, the timing and the skill needed to read the images. Treat these as national typical ranges. The cost for your roof depends on its size, the access and the report you need, and a written quote follows once the work has been scoped.
When is it worth the money? The clearest case is a large flat roof with a recurring leak that has defeated normal checks. If several patch repairs have failed, paying to see the extent of the wet area can save a run of further failures. It is also useful before a major decision such as whether to recover a roof or repair part of it, because it shows how much of the insulation is compromised.
Buyers sometimes ask for one on a house with a flat extension or a commercial unit, to learn whether the roof is hiding trouble before they exchange contracts. If a homebuyer report has flagged a flat roof, see what to do when a homebuyer survey says the roof needs work.
It is less often worth it on a typical pitched tile or slate roof. The loft gives a direct view of the underside, and a standard inspection costs less. If you are unsure, begin with the cheaper check and move up only if it leaves a question open. The page on roof check costs compares the options.
From images to a plan: what you should be given
A thermal survey is only useful if you can understand what it found. At the end you should receive a written report in which each thermal image sits beside an ordinary photograph of the same area, labelled by position on the roof. It should state the date, time and weather, mark the areas of suspected moisture, and say what was done to confirm them. Without that, you have a set of colourful pictures and no way of judging them. Our page on the roof survey report shows how a good one is laid out.
The report should also tell you what it means for the roof. It might say that moisture is limited to one corner and a local repair is the likely answer, that it is spread widely and a full recovering is the sensible option, or that the suspect areas turned out to be dry and the leak lies elsewhere. Each of those is a useful result.
Whatever the finding, the next step is a confirmed cause and a written quote. For our part, we trace the fault first and price afterwards, and the advice is to do the least that cures it. The photographs are of your own roof and the quote is written.
If you would like a hand to decide whether this survey suits your roof, our roof inspections and surveys page explains the options and what we look at on a first visit.